

- How long should you stand at a standing desk? A simple schedule - November 3, 2026
- Best Standing Desks for Small Spaces: 2026 Buyer’s Guide - November 2, 2026
- Best Monitor Arm (2026): Top Picks by Budget and Desk - October 30, 2026
A steel clamp tray rated for 5 kg, a roll of Velcro ties, and one surge strip with switches fix most messy desks. The trick is matching each cable problem to the right part, then mounting it so it stays up.
The best cable management for desk setups stacks three layers. Cut cords with a dock or wireless gear, move the power strip and adapters into an under-desk tray, and bundle what’s left with soft ties or sleeves. Standing desks add one rule: carry slack equal to the desk’s full travel.
Key Takeaways
- A clamp tray like the StarTech CALB-DESK-CABLE-TRAY fits desktops from 5 mm to 50 mm thick and holds 5 kg, so weigh your power strip and adapters before you order.
- Adhesive suits clips and raceways. Trays that carry a strip or dock need clamps or screws, since one forum user watched 3M mounts fail within 30 to 45 days.
- Plug the strip into the wall, never into another strip, and keep it to the four to six low-draw devices most strips are rated for.
- On a sit-stand desk, route cables at full height and leave slack equal to your desk’s travel, which runs 18 to 25 inches on many models.
- Reusable Velcro beats zip ties for anything you’ll change, and each strap should stay loose enough for cables to slide.
- Ballpark budgets run about $25 for a fixed desk and about $150 for a full sit-stand build with a clamp strip and cable chain.
Best cable management for desk setups: match the fix to your desk
Most roundups open with a product list. Start with two facts instead: what your desktop is made of, and whether it moves. Those answers rule out half the options before you compare a single price.
| Your desk | Main problem | Start with | Avoid |
| Fixed wood or laminate | Strip and adapters on the floor | Clamp or screw-mount tray, Velcro ties | Adhesive for heavy loads |
| Sit-stand | Cables pulled tight at full height | Tray, spine or chain, slack loop | Rigid runs along the frame |
| Glass top | Nothing to drill or clamp into | Adhesive tray rated for glass, clips on the frame | Heavy loads stuck to glass |
| Rented or shared | No holes allowed | Clamp tray, adhesive clips, raceway | Screws |
| Wall-mounted | One cord reaching the wall | Strip under the desk, raceway down the wall | Cords under a rug |
| Gaming or PC desk | Dozens of cables from a tower | Large tray, labeled sleeves | Zip ties |
Thickness trips people up first. A clamp tray such as the StarTech CALB-DESK-CABLE-TRAY fits tops from 5 mm to 50 mm thick, so a 2.5 inch butcher-block slab is out, while standard laminate and tempered glass are fine. Measure at the clamp point, not the middle, since lips and routed edges change the number. StarTech under desk cable management tray.
Weight comes second. That same tray holds 5 kg, and a power strip, a dock and a few adapters add up faster than you’d think. A $14 mesh clamp tray covered by BGR lists 15 lb, or about 6.8 kg, but its open weave shows cables from some angles.
Finally, look at the desk edge. Executive desks with shelves or attached hutches often leave no open edge for a clamp. In that case, screws or a freestanding cable box are the realistic options.
Cut the cable count before you buy anything
Every cable you remove is one you never have to hide, so the cheapest cable management move is to unplug something.
Count first, then cut. List every device and its cable, then mark the ones you haven’t touched in a month. Old chargers, a spare HDMI cable and an unused webcam are the usual suspects. Put them in a drawer and see if you miss them after two weeks.
A Thunderbolt 4, Thunderbolt 5 or USB4 dock makes the biggest cut. One host cable runs from the laptop to the dock and carries display, power and data, while the monitor, Ethernet and drives stay plugged into the dock. Check your laptop’s port first, because a basic USB-C port often can’t carry video. best Thunderbolt docking stations.
Wireless peripherals come next. A wireless keyboard, mouse and webcam removes three or four cables from the desktop, and a 3-in-1 charging pad can retire the cords for your phone, earbuds and watch.
Length is the last lever. A 6 ft DisplayPort cable on a monitor 2 ft from the PC leaves 4 ft to coil and hide. A cable that’s too short is worse, though, because it strains the connector the first time the desk shifts. Measure the run, add slack for movement, then buy.
Monitor arms help too. An arm frees the stand’s footprint and gives the monitor’s power and video cords a channel to follow down to the desk edge. best monitor arms.
There’s a tradeoff. A good dock costs a few hundred dollars and adds its own power brick under the desk. If you run one laptop with no external display, the dock won’t earn its price, and tidy routing is the better spend.
Under-desk cable management trays: sizes, capacity and picks
A tray is the single biggest cable management upgrade for most desks, because it lifts the power strip, adapters and spare cable length off the floor in one move.
Pick the size first. Under-desk trays run from about 15 inches to 36 inches long. StarTech’s clamp model adjusts to 2.6, 3.3 or 3.9 ft and measures 4.1 inches wide, with extra headspace for bulky power bars. Measure your strip’s height and plug direction before you order, since a tray that fits too tight forces the cord into a sharp bend at the plug.
Then choose open or closed. Open mesh lets heat and dust pass through, which is the reason FlexiSpot gives for its tray’s open frame. The price is looks, since cables show from some angles and you’ll want to dress them neatly inside. Fabric or solid designs hide more but hold warmth around adapters.
Four options worth a look:
- StarTech CALB-DESK-CABLE-TRAY: clamp mount, powder-coated steel, 5 kg capacity, fits desks 5 mm to 50 mm thick. StarTech tray
- Litwaro metal mesh tray: no-drill clamp, two cable pass-through holes, aimed at standing desks.
- Scandinavian Hub tray set: self-adhesive, two trays, and PopSci’s pick for glass desks.
- FlexiSpot CMP502: screws to the underside, open frame, built to pair with FlexiSpot desk frames.
Cable exits matter too. A tray with slots or holes at both ends lets you feed cords up to the desk and down to the wall without crossing open space. Put the exit nearest the wall outlet, and the strip’s cord won’t hang in a loop.
A tray with no stated capacity is a guess, and a loaded strip, dock and adapters is not the place to guess. If a listing skips the weight rating, skip the tray.
Adhesive, clamp or screws: what actually holds
Weight pulls down on every underside mount, so gravity works against both adhesive and hook-and-loop strips. Where a mount fails tells you which one to pick.
One forum user reported 3M-backed mounts letting go from a wood desk underside within 30 to 45 days. Another said Velcro couldn’t carry a Thunderbolt dock, so they screwed a printed tray to the desk and the cable drag from raising and lowering stopped. Meanwhile, retail reviewers praise adhesive trays on standing desks. Both can be true. Light loads on a clean surface hold, while heavy loads, heat and dust don’t.
| Mount | Best for | Fails when | Reversible |
| Adhesive | Clips, raceways, light trays on glass | Loaded with a strip and adapters, or near a hot window | Mostly, but residue is possible |
| Clamp | Strip, dock and adapters on desks 5 mm to 50 mm thick | The desk has a lip, shelf or thick edge | Yes |
| Screws | Heaviest loads and docks | You rent or the top is glass | No |
If you go with adhesive, clean the surface with isopropyl alcohol, press firmly for 30 seconds and wait a full day before loading it. Skipping the wait is an easy way to lose a tray overnight. Heat softens adhesive, so keep it away from sunny windows and warm power bricks.
For glass, stay with clips and a clamp. A loaded tray glued to glass can fall and break. With screws, drill pilot holes and choose screws shorter than the desktop is thick so they don’t poke through the top. Particleboard holds screws less firmly than solid wood, so spread the load across four points.
Rule of thumb: adhesive for clips and raceways, clamps for trays, screws for docks and anything you’d hate to hear hit the floor.
Where to put the power strip so desk cable management stays safe
Power strips cause real fires. The Electrical Safety Foundation International says more than 3,300 home fires a year start with power strips and extension cords, and fire officials point to overloading and daisy chaining as the main culprits.ESFI power strip safety tips.
Treat the strip as the one part of your setup you shouldn’t cheap out on. Buy a UL-listed surge protector with at least six outlets, individual switches and a rating of 1,000 joules or more. Plug it into the wall, not into another strip. Most strips are approved for about four to six low-draw devices, and a space heater or coffee maker doesn’t belong on one. Look for a model with a cord long enough to reach the wall in a straight run, so you never need an extension.
Mount the strip under the desk edge, close to the rear, so cords drop straight in without crossing open space. Floor placement invites kicks, spills and dust. A clamp-on strip such as the FlexiSpot PS015, rated up to 1,875 watts, puts outlets at the desk edge without drilling. FlexiSpot clamp power strip.
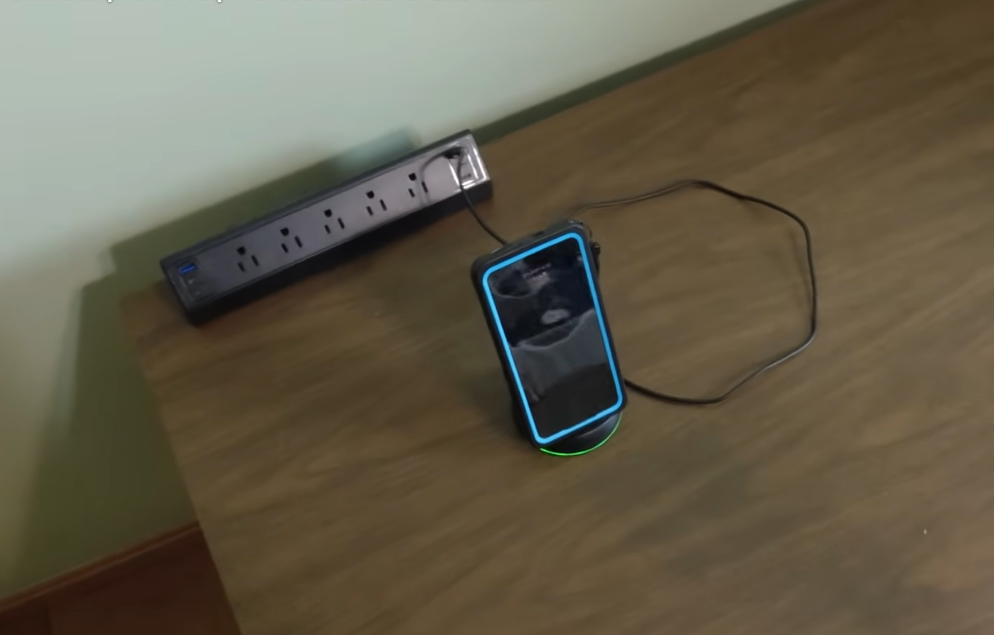
There’s a catch. Guides tell you to tuck the strip into a tray, while fire departments warn against leaving strips under furniture or carpet. The fix is airflow. Use an open mesh tray, don’t pack cables on top of the strip, and leave a gap around power bricks, which run warm.
Small habits matter too. Uncoil the strip’s cord so it lies straight, and never run cords under a rug, where friction can wear through the insulation. Also, every outlet on a 15-amp circuit shares that limit, so a desk on the same circuit as a space heater can trip the breaker.
Sleeves, ties and clips for the cables you can still see
Some cables always stay in view. The monitor’s video line, the keyboard cord and the phone charger all need to reach the desktop, so aim for control over invisibility.
Sleeves group the long runs. A split sleeve like the Alex Tech 10 ft, 1/2 inch loom takes a small bundle, such as monitor power, video and a USB line, and turns it into one cord you can route along the back edge. Alex Tech split cable sleeve.
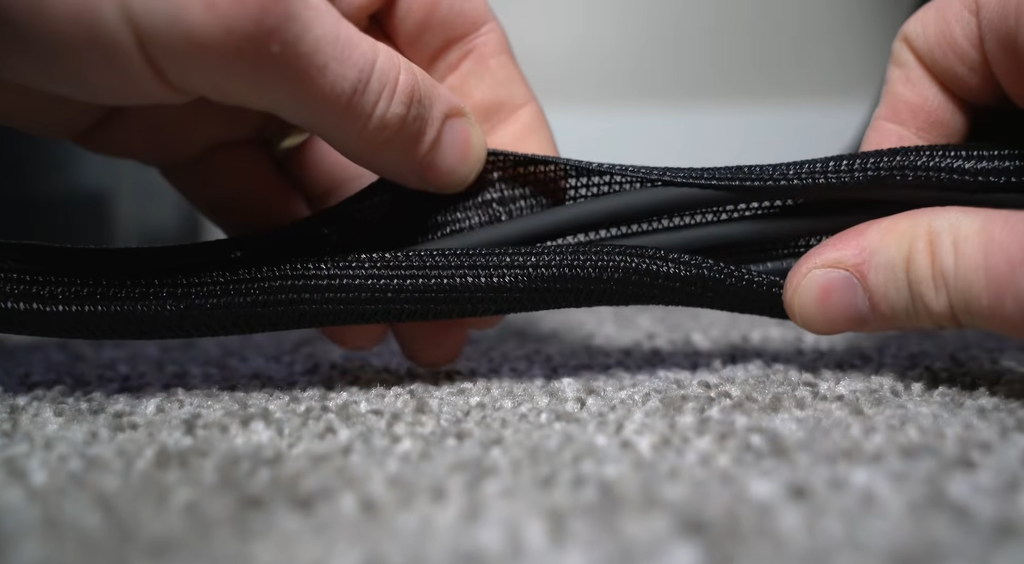
Bundle by destination, not by type. Everything heading to the dock goes in one sleeve, and everything heading to the strip goes in another, so a single cable swap never means unwrapping the lot.
Ties hold bundles in place. Pick reusable hook-and-loop straps over zip ties, because a zip tie is a one-way trip and adding a cable means cutting the lot. Keep each strap loose enough that cables can slide, since over-tightening crushes insulation and strains connectors over time.
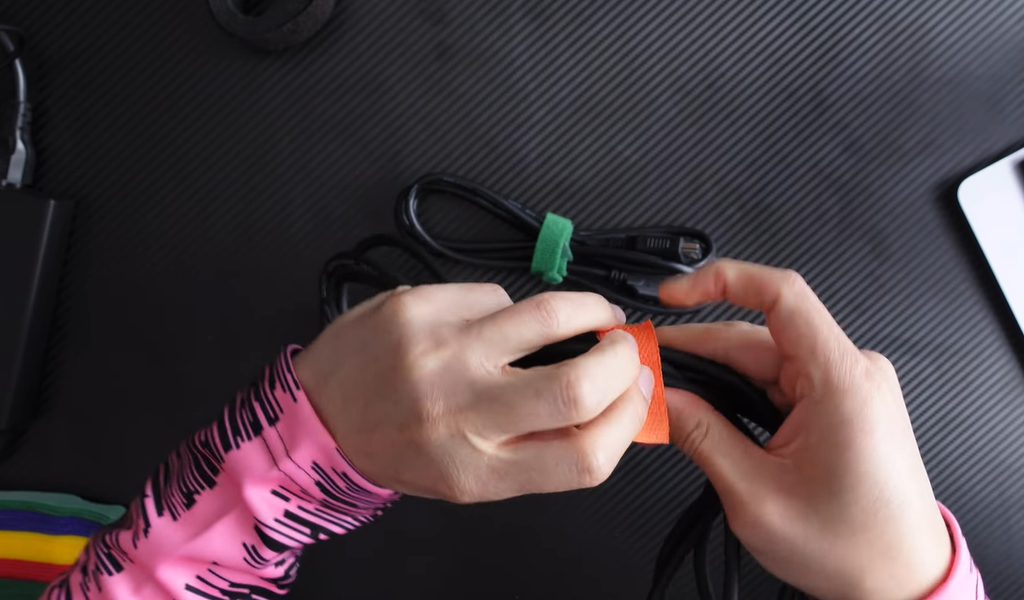
Clips handle single cords. Stick adhesive clips along the back edge and down a leg. On the desktop, a weighted or magnetic holder like the Smartish Cable Wrangler keeps a charging cable from sliding off when you unplug it.
For the wall run, a self-adhesive J-channel or a D-Line cable raceway hides the last few feet to the outlet, and you can paint it to match. If the strip has to live on the floor, a ventilated cable box keeps it out of sight without sealing in heat.
Label both ends of every cable with a strip of tape. Six identical black plugs behind a monitor are impossible to sort by touch. Leave a gentle curve at every connector, too. A cable bent hard against its plug wears out there first.
Standing desk cable management: the slack math
Standing desks are the hard case for cable management. A cable that’s snug at 28 inches goes tight at 48, and the connector pays for it. Brands quote different slack numbers, which looks confusing until you notice they measure different things.
Progressive Automations says a typical desk moves about 25 inches and recommends a 12 to 15 inch loop at the base of the leg. Hexcal budgets about 650 mm of slack per run for a desk that travels from 620 to 1,270 mm. One furniture retailer advises 24 to 30 inches of looped slack on monitor cables and puts typical travel at 18 to 22 inches.
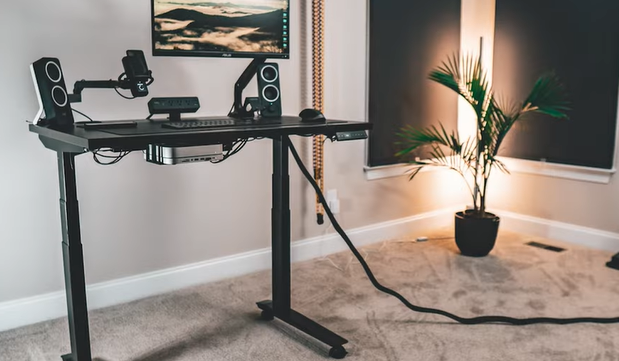
Read together, the rule is simple. Any cord that leaves the desk for the floor or wall needs slack equal to your desk’s travel, while cords that stay on the desk, like keyboard to dock, need none.
Here’s a worked example. Your desk runs from 28 to 48 inches, so travel is 20 inches. The strip cord that exits the tray toward the outlet needs at least 20 inches of spare length, stored as a loose loop at the leg base. If everything else sits inside the tray and moves with the desk, that’s the only cord that has to flex. Keep the loop out of the walking path, since a floor loop that’s too big catches chair wheels.
Do the routing at full height. Raise the desk, lay the cables, then lower it slowly while you watch for tension. Test at both extremes before you close any clips.
If the desk stops and reverses on the way up, check for a snagged cable before you touch the anti-collision sensitivity. Cables catching on the frame are a known cause of false triggers.
Chains, spines and trays that move with a sit-stand desk
UPLIFT splits standing desk cable management into three zones: vertical runs down the leg, horizontal runs along the desktop and containment under it. That split gives you a parts list.
Containment is the easy one. A tray fixed to the underside of the top rises and falls with the desk, so the cords inside never stretch between tray and desktop. Pair the tray with a vertical run, since a complete setup usually needs two of these parts working together.
The vertical run has three options:
- Cable spine: a flexible channel down the leg that expands and contracts. It’s cheap, but it holds only a few cords.
- Magnetic spine: segments snap onto a metal leg and slide as the desk moves. A 2 inch wide version suits cable bundles but it can’t hold a power strip. A 4.3 inch tray can fit a standard two-plug strip.
- Cable chain: a rigid track that holds its shape. Work While Walking rates the iMovR Tucker chain highly for quality and height range, and it comes in Basic, Advanced and Pro kits.
The Pro kit is the first the reviewer saw that addresses standing desk converters. VIVO’s chain costs less, but the same reviewer found its details lacking.
There’s a tradeoff. Chains cost more and take longer to install. If your desk has a short range or only one or two cords reaching the floor, a spine plus a slack loop does the job. Fasten bundles to the leg with loose hook-and-loop straps so they can shift as the leg extends.
Converters that sit on a fixed desk leave nowhere to mount a tray. Put the strip on the fixed desk instead, and run a sleeve or chain from the converter’s cables down to it.
Cable management for glass, floating and rented desks
Some desks fight your cable management. Glass has nothing to screw into, wall-mounted desks have no legs to hide cords along, and a rental lease rules out holes. Each has a workable path.
Glass desks
Skip heavy adhesive loads. Clamp trays with foam pads work on glass as long as the top is at least 5 mm thick, and StarTech lists glass among its supported materials. For lighter gear, an adhesive set like Scandinavian Hub’s two-tray pack can hold on glass, but check its rated load before adding a strip. Clips on a metal frame leg avoid the glass entirely.
Wall-mounted desks
A wall-mounted desk has no legs to hide cords along, so the run to the outlet is the whole problem. Screw a power strip to the underside, guide cords along the back edge with small hooks or clips, and send one cord to the outlet. One DIY project fed that cord through a hole cut in a rug, then warned that cords under rugs can wear through from friction. A paintable raceway down the wall is the safer route.
Rented desks
A rental rules out screws, so use a clamp tray, reusable hook-and-loop straps and adhesive clips. A $14 clamp tray with rubber pads and a 15 lb rating gets the strip off the floor without touching the finish. Check the adhesive’s removal instructions before you stick anything to finished wood, because some leave residue when peeled. [AFFILIATE LINK: no-drill clamp cable tray]
Rented setups also tend to be temporary, so favor a kit you can lift off in five minutes. Put the strip, adapters and spare cable length in the tray, label the cords, and the whole kit comes with you at move-out.
Best cable management for desk on a budget: $25, $60 and $150 builds
These ballpark builds use typical US street prices, which shift by retailer and week, so treat them as targets rather than quotes.
| Build | What’s in it | About | Fits |
| Clip and tie | Reusable Velcro ties, adhesive clips, 6 ft J-channel raceway | $25 | Fixed desk, few cables |
| Tray and strip | Clamp tray, 6-outlet surge strip with switches, 10 ft split sleeve, ties | $60 | Fixed desk, dock and monitors |
| Sit-stand build | Steel clamp tray, clamp power strip, cable spine or chain, sleeve and ties | $150 | Sit-stand desk |
The $25 build covers a fair amount. Velcro bundles the long runs, clips pin the rest to the back edge, and the raceway hides the last stretch to the wall. It can’t lift a power strip off the floor, which is the $60 build’s job.
If you can afford one upgrade, make it the tray. It moves the strip, the bricks and the spare cable length off the floor, which fixes more of the mess than any clip or sleeve.
Be careful with giant bundles. A 192-piece kit such as NOROCME’s includes four sleeves, 11 holders, 35 clips and 100 ties. That’s a fair first-pass purchase, but few desks need 100 ties, and zip ties in particular get cut off the first time you change a cord. [AFFILIATE LINK: NOROCME 192-piece cable management kit]
Spend more in two places. A UL-listed surge protector is worth the extra few dollars, since it’s the part of the setup that carries every load. A sit-stand desk repays a spine or chain, since the alternative is cords pulled tight at full height.
And skip the fancy desk cable box until the basics are done. A bamboo or fabric box looks nice on a console table, but it’s a poor home for a loaded strip and adapters.
A five-step cleanup and the mistakes that undo it
Block out an afternoon and clear the desktop. Nothing in a cable management cleanup needs special skills, but it goes faster when everything’s unplugged and within reach. Keep supplies close: a flashlight, a marker, tape, isopropyl alcohol for cleaning mounting spots and a handful of spare ties. Clear the desktop first so nothing falls on you while you work underneath.
- Unplug and label. Photograph the mess, then put a strip of tape with a name on both ends of every cable.
- Cut the count. Set aside every cable you didn’t use this month and see if anyone misses it. Old chargers and spare HDMI cables are the usual culprits.
- Mount the tray and strip. Use clamps or screws for anything with weight, and keep the strip’s cord straight to the wall.
- Route longest runs first. Group cables by destination, sleeve the bundles, and pin single cords with clips along the back edge. Keeping power on one side and data on the other makes later changes easier.
- Test the slack. On a sit-stand desk, run it through its full range, then tug each connector gently to confirm nothing pulls tight.
Most setups fail in the same few ways:
- Pulling ties tight, which crushes insulation.
- Leaving no slack for a moving desk.
- Daisy chaining strips or leaving one on the floor.
- Trusting adhesive with a loaded tray.
- Buying cables a few inches too short.
- Ignoring heat, with bricks buried under a pile of cables.
- Never auditing: add a cable, forget the label, and the mess returns.
Plan a quarterly audit. Fifteen minutes under the desk every few months catches a loose strap, a dangling cord or a tray that’s starting to sag before it turns into a repair.
Best cable management for desk setups: how to choose
Choose in this order, and you’ll rarely buy the wrong thing.
- Count your cables. A dock and wireless peripherals can remove several before you buy anything.
- Measure your desktop thickness and weigh your load. A clamp tray like StarTech’s handles 5 mm to 50 mm tops and 5 kg.
- Match the mount to the weight: adhesive for clips and raceways, clamps for trays, screws for docks.
- Put a UL-listed surge strip under the desk, plugged straight into the wall and never chained.
- On a sit-stand desk, leave slack equal to your travel and add a spine or chain for the vertical run.
- Bundle what’s left with reusable Velcro and a split sleeve, and label both ends.
Here’s how that plays out by desk. A fixed wood desk needs the $60 build. A sit-stand desk needs the $150 build, plus a slack loop sized to your own travel. A glass or rented desk needs clamps and clips in place of screws and adhesive loads.
The best cable management for desk setups comes down to one idea: reduce what you plug in, lift what’s left off the floor, and give every cable room to move. Buy the tray first, check the strip’s rating, and the rest is small parts.
If you only have ten minutes and ten dollars, buy a roll of reusable ties and label every plug. If you have an hour and fifty dollars, add the clamp tray and a switched surge strip. Skip adhesive for anything that carries a plug, and skip zip ties anywhere you’ll add a cable later.
If you’re also shopping for a desk, pick one with a built-in tray and grommets so you start ahead. best standing desks.
Cable management FAQ
What is the best way to hide cables on a desk?
Combine an under-desk tray, a split sleeve and a few adhesive clips. The tray takes the power strip and adapters, the sleeve bundles the long runs, and clips pin single cords along the back edge. Cutting cables first with a dock or wireless gear shrinks all three jobs.
Are under-desk cable management trays worth it?
Yes, for almost any desk with a power strip. A tray lifts the strip, adapters and spare cable off the floor in one step, which is why it fixes more mess than other parts. Check the weight rating first.
How do I manage cables on a standing desk?
Route cables with the desk at full height and leave slack equal to its travel, often 18 to 25 inches. Mount a tray under the top so its cords move with the desk, and use a spine or chain for the run to the floor.
Are zip ties or Velcro better for cable management?
Velcro, for any desk you’ll change. Zip ties hold harder but must be cut to add a cable, and an over-tightened one can damage insulation. Keep zip ties for fixed runs like a run down a fixed desk’s leg.
Is it safe to put a power strip under a desk?
Yes, if it’s a UL-listed surge protector plugged directly into the wall and not covered. Keep it in an open tray or clamp it to the edge so it can shed heat, and never chain it to another strip.CPSC power strip safety guidance.
How do I hide desk cables without drilling?
Use a clamp-on tray, reusable Velcro straps, adhesive clips and a stick-on raceway for the wall run. A clamp tray like StarTech’s fits tops 5 mm to 50 mm thick without screws. Clean surfaces with isopropyl alcohol before sticking anything.